| Combat Areas23 |
|---|
Arid Drylands  | Arid Drylands (Combat Areas): difficulty Easy. Arid Drylands (arid-drylands) is its own areas row, and the listed figure is Difficulty: Easy. | Difficulty: Easy | no |
Corrupted Farmlands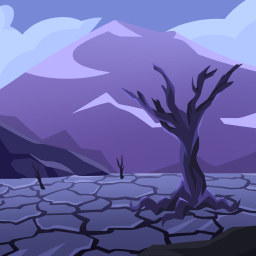 | Corrupted Farmlands (Combat Areas): difficulty Easy. Corrupted Farmlands (corrupted-farmlands) is its own areas row, and the listed figure is Difficulty: Easy. | Difficulty: Easy | no |
Crescent Lake  | Crescent Lake (Combat Areas): difficulty Intermediate. Not available in the demo. Crescent Lake (crescent-lake) is its own areas row, and the listed figure is Difficulty: Intermediate. | Difficulty: Intermediate | yes |
Dark Coast (D) | Dark Coast (D) (Combat Areas): difficulty Easy. Dark Coast (D) (dark-coast-d) is its own areas row, and the listed figure is Difficulty: Easy. | Difficulty: Easy | no |
Forsaken Hollow (D) | Forsaken Hollow (D) (Combat Areas): difficulty Easy. Not available in the demo. Forsaken Hollow (D) (forsaken-hollow-d) is its own areas row, and the listed figure is Difficulty: Easy. | Difficulty: Easy | yes |
Frozen Lands | Frozen Lands (Combat Areas): difficulty Easy. Frozen Lands (frozen-lands) is its own areas row, and the listed figure is Difficulty: Easy. | Difficulty: Easy | no |
Glowing Depths - Combat Areas | Glowing Depths - Combat Areas: difficulty Advanced. Not available in the demo. Glowing Depths - Combat Areas (glowing-depths) is its own areas row, and the listed figure is Difficulty: Advanced. | Difficulty: Advanced | yes |
Golbin Forest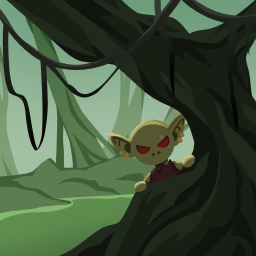 | Golbin Forest (Combat Areas): difficulty Easy. Golbin Forest (golbin-forest) is its own areas row, and the listed figure is Difficulty: Easy. | Difficulty: Easy | no |
Green Mangroves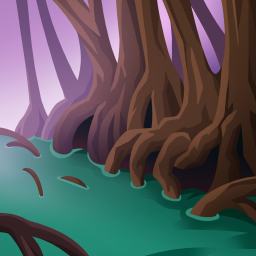 | Green Mangroves (Combat Areas): difficulty Intermediate. Green Mangroves (green-mangroves) is its own areas row, and the listed figure is Difficulty: Intermediate. | Difficulty: Intermediate | no |
Haunted Graveyard | Haunted Graveyard (Combat Areas): difficulty Easy. Haunted Graveyard (haunted-graveyard) is its own areas row, and the listed figure is Difficulty: Easy. | Difficulty: Easy | no |
Misty Thicket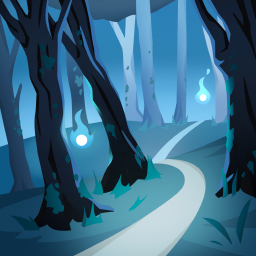 | Misty Thicket (Combat Areas): difficulty Intermediate; Woodcutting level 35. Misty Thicket (misty-thicket) is its own areas row, and the listed figure is Difficulty: Intermediate. | Difficulty: Intermediate | no |
Misty Wetlands | Misty Wetlands (Combat Areas): difficulty Easy. Misty Wetlands (misty-wetlands) is its own areas row, and the listed figure is Difficulty: Easy. | Difficulty: Easy | no |
Rocky Canyon | Rocky Canyon (Combat Areas): difficulty Easy. Rocky Canyon (rocky-canyon) is its own areas row, and the listed figure is Difficulty: Easy. | Difficulty: Easy | no |
Saltwind Bay | Saltwind Bay (Combat Areas): difficulty Easy. Saltwind Bay (saltwind-bay) is its own areas row, and the listed figure is Difficulty: Easy. | Difficulty: Easy | no |
Shipwreck Expanse | Shipwreck Expanse (Combat Areas): difficulty Easy. Shipwreck Expanse (shipwreck-expanse) is its own areas row, and the listed figure is Difficulty: Easy. | Difficulty: Easy | no |
Shipwreck Isles | Shipwreck Isles (Combat Areas): difficulty Elite. Not available in the demo. Shipwreck Isles (shipwreck-isles) is its own areas row, and the listed figure is Difficulty: Elite. | Difficulty: Elite | yes |
Submerged Cavern (D) | Submerged Cavern (D) (Combat Areas): difficulty Easy. Not available in the demo. Submerged Cavern (D) (submerged-cavern-d) is its own areas row, and the listed figure is Difficulty: Easy. | Difficulty: Easy | yes |
Swelling Tempest | Swelling Tempest (Combat Areas): difficulty Easy. Swelling Tempest (swelling-tempest) is its own areas row, and the listed figure is Difficulty: Easy. | Difficulty: Easy | no |
Tideclaw Shores | Tideclaw Shores (Combat Areas): difficulty Easy. Tideclaw Shores (tideclaw-shores) is its own areas row, and the listed figure is Difficulty: Easy. | Difficulty: Easy | no |
Towering Cliffs | Towering Cliffs (Combat Areas): difficulty Easy. Towering Cliffs (towering-cliffs) is its own areas row, and the listed figure is Difficulty: Easy. | Difficulty: Easy | no |
Towering Divide | Towering Divide (Combat Areas): difficulty Advanced. Towering Divide (towering-divide) is its own areas row, and the listed figure is Difficulty: Advanced. | Difficulty: Advanced | no |
Valley of Whispers | Valley of Whispers (Combat Areas): difficulty Easy. Valley of Whispers (valley-of-whispers) is its own areas row, and the listed figure is Difficulty: Easy. | Difficulty: Easy | no |
Wellspring Cavern (D) | Wellspring Cavern (D) (Combat Areas): difficulty Easy. Not available in the demo. Wellspring Cavern (D) (wellspring-cavern-d) is its own areas row, and the listed figure is Difficulty: Easy. | Difficulty: Easy | yes |
| Slayer Zones23 |
|---|
Blackstone Basin | Blackstone Basin (Slayer Zones): difficulty Advanced; Slayer level 50. Blackstone Basin (blackstone-basin) is its own areas row, and the listed figure is Difficulty: Advanced. | Difficulty: Advanced | no |
Bloodlands | Bloodlands (Slayer Zones): difficulty Elite. Not available in the demo. Bloodlands (bloodlands) is its own areas row, and the listed figure is Difficulty: Elite. | Difficulty: Elite | yes |
Cavern of Experiments (D) | Cavern of Experiments (D) (Slayer Zones): difficulty Easy. Not available in the demo. Cavern of Experiments (D) (cavern-of-experiments-d) is its own areas row, and the listed figure is Difficulty: Easy. | Difficulty: Easy | yes |
Crystalline Glades | Crystalline Glades (Slayer Zones): difficulty Easy. Crystalline Glades (crystalline-glades) is its own areas row, and the listed figure is Difficulty: Easy. | Difficulty: Easy | no |
Desert Plains | Desert Plains (Slayer Zones): difficulty Advanced. Not available in the demo. Desert Plains (desert-plains) is its own areas row, and the listed figure is Difficulty: Advanced. | Difficulty: Advanced | yes |
Dragon's Pass | Dragon's Pass (Slayer Zones): difficulty Advanced; Slayer level 40. Dragon's Pass (dragon-s-pass) is its own areas row, and the listed figure is Difficulty: Advanced. | Difficulty: Advanced | no |
Drowned Abyss | Drowned Abyss (Slayer Zones): difficulty AwHellNah. Not available in the demo. Drowned Abyss (drowned-abyss) is its own areas row, and the listed figure is Difficulty: AwHellNah. | Difficulty: AwHellNah | yes |
Frozen Ruins | Frozen Ruins (Slayer Zones): difficulty Easy. Frozen Ruins (frozen-ruins) is its own areas row, and the listed figure is Difficulty: Easy. | Difficulty: Easy | no |
Gemstone Pinnacles | Gemstone Pinnacles (Slayer Zones): difficulty Elite. Not available in the demo. Gemstone Pinnacles (gemstone-pinnacles) is its own areas row, and the listed figure is Difficulty: Elite. | Difficulty: Elite | yes |
Glacial Caves | Glacial Caves (Slayer Zones): difficulty Easy. Glacial Caves (glacial-caves) is its own areas row, and the listed figure is Difficulty: Easy. | Difficulty: Easy | no |
Green Mist Swamp | Green Mist Swamp (Slayer Zones): difficulty Easy. Green Mist Swamp (green-mist-swamp) is its own areas row, and the listed figure is Difficulty: Easy. | Difficulty: Easy | no |
Kelp Gardens | Kelp Gardens (Slayer Zones): difficulty Easy. Kelp Gardens (kelp-gardens) is its own areas row, and the listed figure is Difficulty: Easy. | Difficulty: Easy | no |
Kelsarin Wastes | Kelsarin Wastes (Slayer Zones): difficulty Elite. Not available in the demo. Kelsarin Wastes (kelsarin-wastes) is its own areas row, and the listed figure is Difficulty: Elite. | Difficulty: Elite | yes |
Lizard Vale | Lizard Vale (Slayer Zones): difficulty Easy. Lizard Vale (lizard-vale) is its own areas row, and the listed figure is Difficulty: Easy. | Difficulty: Easy | no |
Moonscarred Crater | Moonscarred Crater (Slayer Zones): difficulty Advanced. Not available in the demo. Moonscarred Crater (moonscarred-crater) is its own areas row, and the listed figure is Difficulty: Advanced. | Difficulty: Advanced | yes |
Sea of Sand | Sea of Sand (Slayer Zones): difficulty Advanced. Not available in the demo. Sea of Sand (sea-of-sand) is its own areas row, and the listed figure is Difficulty: Advanced. | Difficulty: Advanced | yes |
Slime Forest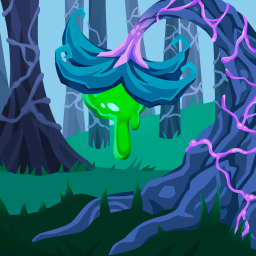 | Slime Forest (Slayer Zones): difficulty Easy. Slime Forest (slime-forest) is its own areas row, and the listed figure is Difficulty: Easy. | Difficulty: Easy | no |
Stinging Nest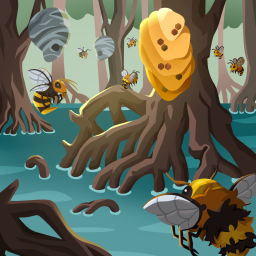 | Stinging Nest (Slayer Zones): difficulty Intermediate; Slayer level 15. Stinging Nest (stinging-nest) is its own areas row, and the listed figure is Difficulty: Intermediate. | Difficulty: Intermediate | no |
Storm Valley | Storm Valley (Slayer Zones): difficulty Elite. Not available in the demo. Storm Valley (storm-valley) is its own areas row, and the listed figure is Difficulty: Elite. | Difficulty: Elite | yes |
Storms Passage | Storms Passage (Slayer Zones): difficulty Easy. Storms Passage (storms-passage) is its own areas row, and the listed figure is Difficulty: Easy. | Difficulty: Easy | no |
Sunken Shipwreck | Sunken Shipwreck (Slayer Zones): difficulty Easy. Sunken Shipwreck (sunken-shipwreck) is its own areas row, and the listed figure is Difficulty: Easy. | Difficulty: Easy | no |
Toxic Bog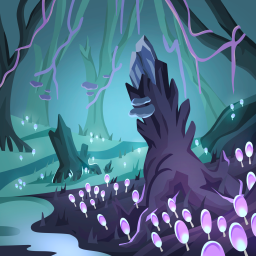 | Toxic Bog (Slayer Zones): difficulty Intermediate; Slayer level 25. Toxic Bog (toxic-bog) is its own areas row, and the listed figure is Difficulty: Intermediate. | Difficulty: Intermediate | no |
Windy Plains | Windy Plains (Slayer Zones): difficulty Elite. Not available in the demo. Windy Plains (windy-plains) is its own areas row, and the listed figure is Difficulty: Elite. | Difficulty: Elite | yes |
| Standard Dungeons12 |
|---|
Black Dragon's Lair | Black Dragon's Lair (Standard Dungeons): difficulty Elite. Not available in the demo. Black Dragon's Lair (black-dragon-s-lair) is its own areas row, and the listed figure is Difficulty: Elite. | Difficulty: Elite | yes |
Blackstone Gauntlet | Blackstone Gauntlet (Standard Dungeons): difficulty Advanced. Not available in the demo. Blackstone Gauntlet (blackstone-gauntlet) is its own areas row, and the listed figure is Difficulty: Advanced. | Difficulty: Advanced | yes |
Blighted Scar | Blighted Scar (Standard Dungeons): difficulty Elite. Not available in the demo. Blighted Scar (blighted-scar) is its own areas row, and the listed figure is Difficulty: Elite. | Difficulty: Elite | yes |
Blood Sanctum | Blood Sanctum (Standard Dungeons): difficulty Elite. Not available in the demo. Blood Sanctum (blood-sanctum) is its own areas row, and the listed figure is Difficulty: Elite. | Difficulty: Elite | yes |
Glowsquid Caverns | Glowsquid Caverns (Standard Dungeons): difficulty Elite. Not available in the demo. Glowsquid Caverns (glowsquid-caverns) is its own areas row, and the listed figure is Difficulty: Elite. | Difficulty: Elite | yes |
Harvest Farm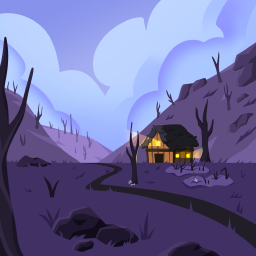 | Harvest Farm (Standard Dungeons): difficulty Intermediate. Harvest Farm (harvest-farm) is its own areas row, and the listed figure is Difficulty: Intermediate. | Difficulty: Intermediate | no |
Hobgolbin Camp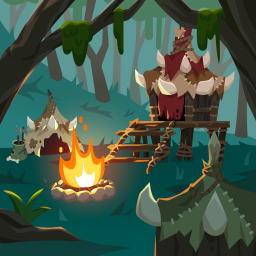 | Hobgolbin Camp (Standard Dungeons): difficulty Easy. Hobgolbin Camp (hobgolbin-camp) is its own areas row, and the listed figure is Difficulty: Easy. | Difficulty: Easy | no |
Kraken's Domain | Kraken's Domain (Standard Dungeons): difficulty AwHellNah. Not available in the demo. Kraken's Domain (kraken-s-domain) is its own areas row, and the listed figure is Difficulty: AwHellNah. | Difficulty: AwHellNah | yes |
Murkwood Lair | Murkwood Lair (Standard Dungeons): darkness 50; difficulty Advanced. Not available in the demo. Murkwood Lair (murkwood-lair) is its own areas row, and the listed figure is Darkness: 50. | Darkness: 50 | yes |
Shiftsand Ruins | Shiftsand Ruins (Standard Dungeons): difficulty Elite. Not available in the demo. Shiftsand Ruins (shiftsand-ruins) is its own areas row, and the listed figure is Difficulty: Elite. | Difficulty: Elite | yes |
Venom Pit | Venom Pit (Standard Dungeons): difficulty Advanced. Venom Pit (venom-pit) is its own areas row, and the listed figure is Difficulty: Advanced. | Difficulty: Advanced | no |
Wurm Hunt | Wurm Hunt (Standard Dungeons): difficulty Elite. Not available in the demo. Wurm Hunt (wurm-hunt) is its own areas row, and the listed figure is Difficulty: Elite. | Difficulty: Elite | yes |
| Dark Areas4 |
|---|
Dracolith Caverns | Dracolith Caverns (Dark Areas): darkness 83; difficulty AwHellNah. Not available in the demo. Dracolith Caverns (dracolith-caverns) is its own areas row, and the listed figure is Darkness: 83. | Darkness: 83 | yes |
Dreary Barrens | Dreary Barrens (Dark Areas): darkness 76; difficulty Elite. Not available in the demo. Dreary Barrens (dreary-barrens) is its own areas row, and the listed figure is Darkness: 76. | Darkness: 76 | yes |
Mausoleum | Mausoleum (Dark Areas): darkness 54; difficulty Advanced. Not available in the demo. Mausoleum (mausoleum) is its own areas row, and the listed figure is Darkness: 54. | Darkness: 54 | yes |
Murkwoods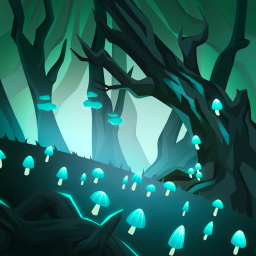 | Murkwoods (Dark Areas): darkness 36; difficulty Intermediate. Murkwoods (murkwoods) is its own areas row, and the listed figure is Darkness: 36. | Darkness: 36 | no |
| Quests5 |
|---|
Act 1 - Boarish Bonfire | Act 1 - Boarish Bonfire (Quests): difficulty Easy. Act 1 - Boarish Bonfire (act-1-boarish-bonfire) is its own areas row, and the listed figure is Difficulty: Easy. | Difficulty: Easy | no |
Act 1 - In the Thick of It | Act 1 - In the Thick of It (Quests): difficulty Easy. Act 1 - In the Thick of It (act-1-in-the-thick-of-it) is its own areas row, and the listed figure is Difficulty: Easy. | Difficulty: Easy | no |
Act 1 - Pointy Preparation | Act 1 - Pointy Preparation (Quests): difficulty Easy. Act 1 - Pointy Preparation (act-1-pointy-preparation) is its own areas row, and the listed figure is Difficulty: Easy. | Difficulty: Easy | no |
Act 1 - Rocky Rumble | Act 1 - Rocky Rumble (Quests): difficulty Easy. Act 1 - Rocky Rumble (act-1-rocky-rumble) is its own areas row, and the listed figure is Difficulty: Easy. | Difficulty: Easy | no |
Act 1 - Tree Trimming | Act 1 - Tree Trimming (Quests): difficulty Easy. Act 1 - Tree Trimming (act-1-tree-trimming) is its own areas row, and the listed figure is Difficulty: Easy. | Difficulty: Easy | no |
| Fishing spots5 |
|---|
Glowing Depths - Fishing location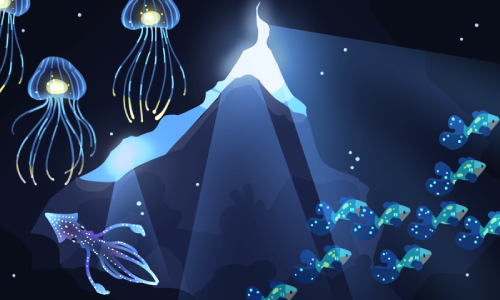 | Glowing Depths - Fishing location: Fishing level 49. Glowing Depths - Fishing location (glowing-depths-fishing-location) is its own areas row, and the listed figure is none. | none | no |
Lemvor Pier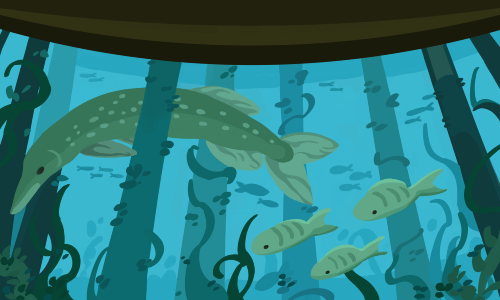 | Lemvor Pier: Fishing level 18. Lemvor Pier (lemvor-pier) is its own areas row, and the listed figure is none. | none | no |
Shallow Shores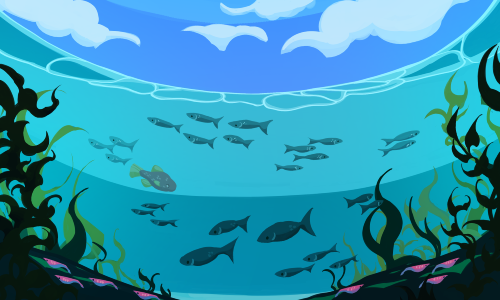 | Shallow Shores: Fishing level 1. Shallow Shores (shallow-shores) is its own areas row, and the listed figure is none. | none | no |
Shrapnel River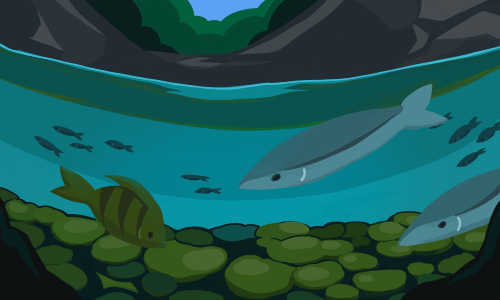 | Shrapnel River: Fishing level 12. Shrapnel River (shrapnel-river) is its own areas row, and the listed figure is none. | none | no |
Windy Coastline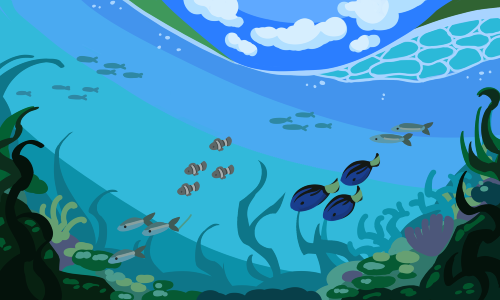 | Windy Coastline: Fishing level 27. Windy Coastline (windy-coastline) is its own areas row, and the listed figure is none. | none | no |
| Hunting grounds10 |
|---|
Bushlands | Bushlands is a hunting location for Wild Chicken, Wild Cow, Greentail Bird, and Bushland Rabbit. Bushlands (bushlands) is its own areas row, and the listed figure is none. | none | no |
Highlands | Highlands is a hunting location for Raptor, Blood Hawk, Giant Eagle, and Griffin. Not available in the demo. | none | yes |
Mire | Mire is a hunting location for Ghostly Butterfly, Phantom, Spirit, and Spectre. Not available in the demo. Mire (mire) is its own areas row, and the listed figure is none. | none | yes |
Moonlit Hills | Moonlit Hills is a hunting location for Crescent Butterfly, Night Raven, Moonscale Gecko, and Shadow Fox. Not available in the demo. | none | yes |
Plains | Plains is a hunting location for Vulture, Striped Hyena, Wildebeast, Wild Caribou, and Scabjaw Beast. Not available in the demo. | none | yes |
Steppes | Steppes is a hunting location for Steppes Rabbit, Wild Elk, Wild Wolf, and Harpy. Steppes (steppes) is its own areas row, and the listed figure is none. | none | no |
Swamps | Swamps is a hunting location for Scamp Toad, Swamp Snake, Yellowtail Bird, and Green Toad. Swamps (swamps) is its own areas row, and the listed figure is none. | none | no |
Thicket | Thicket is a hunting location for Giant Spider, Skull Butterfly, Blacktail Bird, and Black Fang Spider. Thicket (thicket) is its own areas row, and the listed figure is none. | none | no |
Torag Grounds | Torag Grounds is a hunting location for Belra Torag, Gar Torag, Fin Torag, and Cul Torag. Not available in the demo. | none | yes |
Woodlands | Woodlands is a hunting location for Green Butterfly, Thornback Lizard, Bluetail Bird, and Wild Boar. Woodlands (woodlands) is its own areas row, and the listed figure is none. | none | no |
| Thieving spots9 |
|---|
Bandit Encampment | Bandit Encampment is a thieving location for Bandit, Bandit Fletcher, Bandit Woodcutter, Bandit Leader, and Stolen Goods. Bandit Encampment (bandit-encampment) is its own areas row, and the listed figure is none. | none | no |
Capital Marketplace | Capital Marketplace is a thieving location for Blacksmith, Crafting Stall, Locked Bank Chest, Capital Citizen, and Capital Seed Stall. | none | no |
Desert Palace | Desert Palace is a thieving location for Palace Citizen, Gem Stall, Palace Guard, Palace Battlemage, and Palace Vault. Not available in the demo. | none | yes |
Farmers Market | Farmers Market is a thieving location for Farmer, Locked Ranchers Chest, Market Seed Stall, and Herbalist. Farmers Market (farmers-market) is its own areas row, and the listed figure is none. | none | no |
Gol Camp | Gol Camp is a thieving location for Locked Beast Chest, Hunter, and Chieftain. Not available in the demo. | none | yes |
Keltesta Mining Town | Keltesta Mining Town is a thieving location for Miner, Stone Mason, Carpenter, Ore Stall, and Deep Mine. Not available in the demo. | none | yes |
Lowtown District | Lowtown District is a thieving location for Citizen, Thug, Locked Thug Chest, and Thug Chief. Lowtown District (lowtown-district) is its own areas row, and the listed figure is none. | none | no |
Mage Tower | Mage Tower is a thieving location for Wizard Scholar, Runecrafter, Wizard, Forbidden Library, and Astrologer. Mage Tower (mage-tower) is its own areas row, and the listed figure is none. | none | no |
Seashade Port | Seashade Port is a thieving location for Cooking Stall, Craftsman, Fisherman, and Chef. Seashade Port (seashade-port) is its own areas row, and the listed figure is none. | none | no |
| Other places4 |
|---|
Coral Reef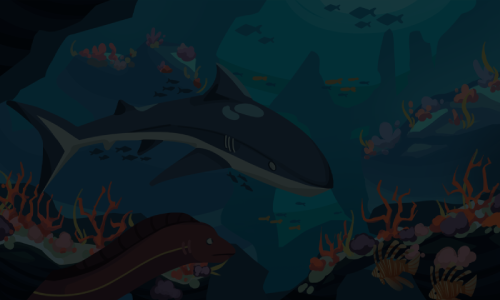 | Coral Reef. Not available in the demo. Coral Reef (coral-reef) is its own areas row, and the listed figure is none. | none | yes |
Open Ocean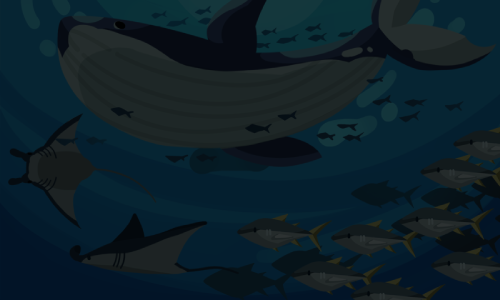 | Open Ocean. Not available in the demo. Open Ocean (open-ocean) is its own areas row, and the listed figure is none. | none | yes |
Quests | Quests. Not available in the demo. Quests (quests) is its own areas row, and the listed figure is none. | none | yes |
Salt in the Wind | Salt in the Wind. Not available in the demo. Salt in the Wind (salt-in-the-wind) is its own areas row, and the listed figure is none. | none | yes |
